
I’ve been prepping for years now, and if there’s one thing I’ve learned, it’s that disasters don’t wait until you’re ready. Whether it’s wildfires, hurricanes, blackouts, or something more unexpected, the time to prepare isn’t when the sirens are blaring—it’s right now.
And yet, most Americans are still behind the curve.
Every year, I talk to people who admit they know a disaster could hit their area soon, but they haven’t taken the steps to get ready. The numbers speak for themselves:
- Around 4 in 10 people openly admit they aren’t prepared for a natural disaster at all.
- Over half the population lacks a basic emergency plan, even though many believe they’ll face a major disaster within five years.
- While 57% say they’ve made at least a few preparations, very few have gone far enough.
- Only 46% have a kit with supplies that would last their entire household for several days, and just barely over half keep two weeks’ worth of food on hand.
And with climate-related events becoming more extreme and frequent, this level of unpreparedness is a real problem.
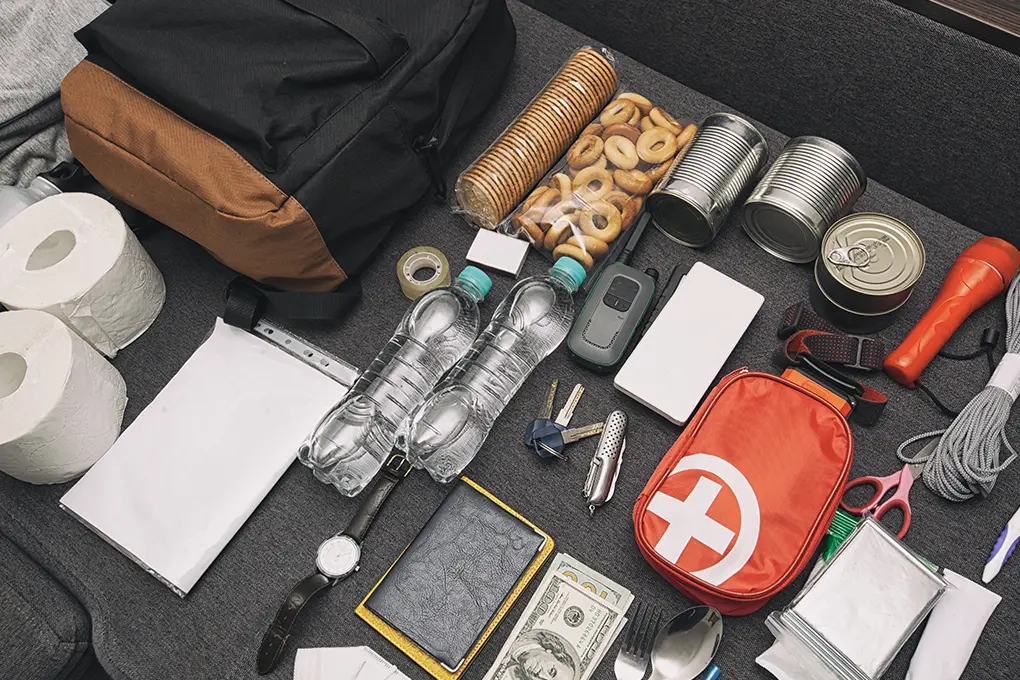
That’s why today, I’m going to break down exactly what you need to build a 72-hour bug-out bag, something every household should have. This go-bag will give you a solid buffer to survive the critical first few days after a disaster strikes, whether you’re sheltering in place or hitting the road.
Table of Contents
- Key Takeaways
- What Is a Bug-Out Bag?
- Core Principles for an Effective Bug-Out Bag
- Essential Bug-Out Bag Categories
- Building Your Bug-Out Bag: Step-by-Step Approach
- Special Considerations
- DIY vs. Pre-Made Bug-Out Bags
- Maintaining Your Bug-Out Bag
- Final Thoughts: Preparedness Mindset
- Frequently Asked Questions
Key Takeaways
- Most people are underprepared and lack a functional emergency plan.
- A well-built bug-out bag must support survival for at least 72 hours.
- Water, food, shelter, fire, and first aid are the core categories to focus on.
- Navigation and communication gear are critical when networks fail.
- Tools should be multi-purpose and reliable under stress.
- Bug-out bags should be tested, updated seasonally, and personalized.
- Families, vehicles, and regional risks require tailored bug-out strategies.
What Is a Bug-Out Bag?
A bug-out bag (BOB), also called a go-bag, 72-hour kit, or emergency evacuation kit, is a portable collection of essential supplies you’d need to survive for at least three days if forced to leave your home due to a natural disaster, civil unrest, or other emergency.
The term “bug out” originated in military contexts, referring to a rapid evacuation from a dangerous area. Today, emergency management agencies like Ready.gov recommend everyone have some form of emergency kit ready to grab at a moment’s notice.
Core Principles for an Effective Bug-Out Bag
Before discussing specific items, understand these foundational principles:
- The 72-Hour Standard: Your bag should contain enough supplies to sustain you for at least three days, the typical time before assistance might arrive in widespread emergencies.
- Weight Considerations: A fully-loaded bug-out bag shouldn’t exceed 20-25% of your body weight. For most adults, aim for 20-30 pounds maximum.
- Personalization Matters: While this guide covers essential categories, your specific needs will vary based on:
- Your region’s climate and likely disasters
- Family size and specific needs (children, elderly, pets)
- Your physical capabilities
- Your survival skills and knowledge
- Quality Over Quantity: For items protecting your life, invest in reliability rather than seeking the cheapest option.
Essential Bug-Out Bag Categories
A properly packed 72-hour bug-out bag should cover your core survival needs: water, food, shelter, and protection from the elements. These categories form the foundation of a well-balanced emergency kit, and they should be tailored to your region, family size, and specific threats.
1. Water & Hydration
Clean water is essential. Dehydration affects physical performance, cognitive function, and overall safety, especially under stress. While bottled water is useful, purification options are more versatile and sustainable in the field. You should prepare to have at least one gallon of water per day, per person.
Water Supplies and Tools to Include
- Durable water containers with tight seals
- Collapsible water bladders for high-volume water collection
- At least two filtration methods, such as:
- LifeStraw, Sawyer Mini, or Katadyn filters
- Water purification tablets or drops
- Gravity-fed or squeeze-style filtration systems
- Portable water bottle filtration systems
If you live in a colder climate, be sure your filters can handle freezing temperatures—some models become unusable if frozen after being wetted. Consider insulated covers or storing filters inside your jacket at night.
Pro Tip
In addition to planning your route, mark known water sources on a printed map. GPS and phones may not work in disaster scenarios, so rely on analog backups. This is essential seeing that 77% of Americans experience water supply disruptions during or after a natural disaster.
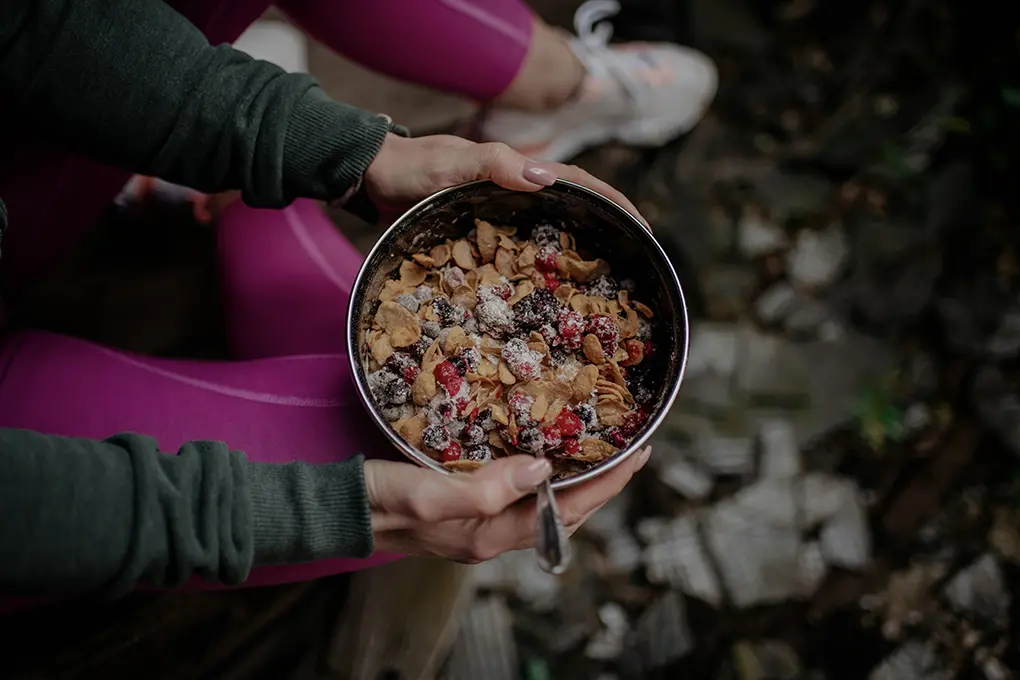
2. Food & Nutrition
In a survival situation, your body needs fuel to maintain strength, alertness, and the stamina to make sound decisions. The food you pack should require little to no preparation, be lightweight, calorie-dense, and shelf-stable under a wide range of temperatures. Your goal is to pack around 2,000 to 2,500 calories per person per day for at least three days.
Core Food Items to Include
- Ready-To-Eat Meals (MREs): These are convenient, balanced, and require no cooking. Choose vacuum-sealed options with heating elements for added flexibility.
- Emergency Rations or Food Bars: Compact and calorie-rich (like SOS or Datrex), these can serve as meal replacements with long shelf lives and minimal bulk.
- Freeze-Dried Meals: Lightweight and easy to rehydrate with hot water, these provide complete meals with high energy density. Store a metal cup or pot for boiling water if you pack these.
- Long-Term Food Storage Pouches: Vacuum-sealed meal packets designed for disaster kits are ideal for multi-day use.
High-Energy Snacks
Pack snacks that deliver sustained energy and resist spoilage:
- Trail mix, nuts, and seeds for fats and protein
- Energy or protein bars for quick boosts
- Dried fruit and jerky for fiber, sugar, and protein
- Nut butter packets (single-serve) for compact calorie sources
Hydration Support and Beverages
Water alone won’t replace lost electrolytes. Be sure to include:
- Electrolyte powder packets (like Liquid I.V., LMNT, or DripDrop)
- Powdered drink mixes for flavor variety and morale
- Instant coffee or tea for caffeine and comfort during stressful situations
Optional Cooking Kit
While all food should be edible without cooking, having a basic setup can greatly improve morale and digestion:
- Compact stove with fuel (butane or solid fuel preferred for portability)
- Metal cup or small pot for boiling water or heating meals
- Utensil set or spork
- Firestarter or stormproof matches to ignite your stove if needed
Storage and Rotation Tips
- Rotate all food supplies every 6 to 12 months.
- Clearly label expiration dates on packaging.
- Store food in sealed mylar bags or waterproof pouches to prevent damage from moisture, pests, or punctures.
- Include a manual can opener if any of your food is canned.
Pro Tip
Don’t forget the mental side of eating. Comfort food, such as a chocolate bar, instant noodles, or powdered cocoa, can improve morale during stressful conditions. One or two familiar treats can go a long way toward keeping spirits up in an emergency.
3. Shelter & Warmth
Your ability to maintain core body temperature is just as critical as food and water in a survival scenario. Without proper shelter, exposure to wind, rain, cold, or even intense heat can quickly lead to hypothermia or heat exhaustion, both of which can be life-threatening in a crisis. Your bug-out bag should give you the tools to stay dry, warm, and protected in unpredictable conditions.
Emergency Shelter Options
At a minimum, your kit should include components that allow you to create or assemble a waterproof, wind-resistant shelter:
- Ultralight backpacking tent (1- or 2-person models are ideal for portability)
- Emergency bivy sack (space-saving and adds warmth when paired with a sleeping bag)
- Compact tarp (versatile for building makeshift shelters or ground cover)
- Paracord or strong nylon cord (25–50 feet for rigging tarps, tying down gear, or securing shelters)
- Mylar emergency blankets (at least one per person; use for warmth or reflective heat barriers)
Sleep System Essentials
Sleeping gear is critical for preserving energy and ensuring rest. Prioritize insulation from the ground and moisture protection:
- Sleeping bag rated for your climate (down or synthetic; synthetic is better in wet areas)
- Foam sleeping pad or inflatable pad (prevents heat loss through ground contact)
- Stuff sack or compression bag to reduce size and protect against moisture
Weather Protection Clothing
Clothing is part of your shelter system. Layering allows better temperature control across a variety of environments:
- Rain jacket or poncho for waterproofing
- Warm hat or beanie to prevent heat loss from your head
- Light gloves or insulated gloves for colder climates
- Buff or bandana for sun, wind, and dust protection
- Lightweight fleece or base layer for warmth that dries quickly
- Extra socks and underwear in a waterproof bag
Pro Tips for Shelter Success
- Practice setting up your shelter ahead of time—don’t wait until it’s raining to learn how your tarp works
- Use natural windbreaks or overhead cover when choosing a shelter site
- Insulate underneath your sleeping area with pine boughs, cardboard, or even extra clothing if you don’t have a pad
- In warm climates, shade and ventilation matter just as much as staying dry
Seasonal Adjustments
Your bug-out bag should be reviewed and updated based on the season. In cold months, consider adding:
- Hand and toe warmers
- Wool socks
- Extra thermal layers
- A heavier sleeping bag or liner for below-freezing conditions
In warmer months, you may swap heavier gear for:
- Insect repellent or treated clothing
- Mosquito netting
- Sun hat and SPF-rated clothing
4. Fire & Light
The ability to create fire and produce reliable light can drastically increase your chances of survival, particularly in cold, dark, or uncertain conditions. Fire provides warmth, a way to purify water, and the ability to cook food. Light sources help prevent injury, allow for nighttime navigation, and offer comfort during stressful events.
For fire starting, pack multiple ignition methods. Lighters are easy and effective but should be backed up with waterproof matches in a sealed case.
A ferro rod and striker provide a near-infinite number of sparks and work in wet conditions. Include fire-starting aids such as cotton balls soaked in petroleum jelly or prepackaged tinder to get flames going quickly.
For light, bring a headlamp for hands-free visibility and a flashlight as a backup. Chemical light sticks are useful for quick signaling or room lighting without the need for batteries. Candles offer long-lasting light, but they require proper ventilation.
Fire and lighting essentials
- Lighters (minimum two)
- Waterproof matches in sealed container
- Ferro rod with striker
- Fire-starting aids
- Headlamp and flashlight with spare batteries
- Light sticks and candles
Pro Tip
Solar or hand-crank flashlights can be reliable alternatives to battery-powered devices but should be tested ahead of time for brightness and durability.
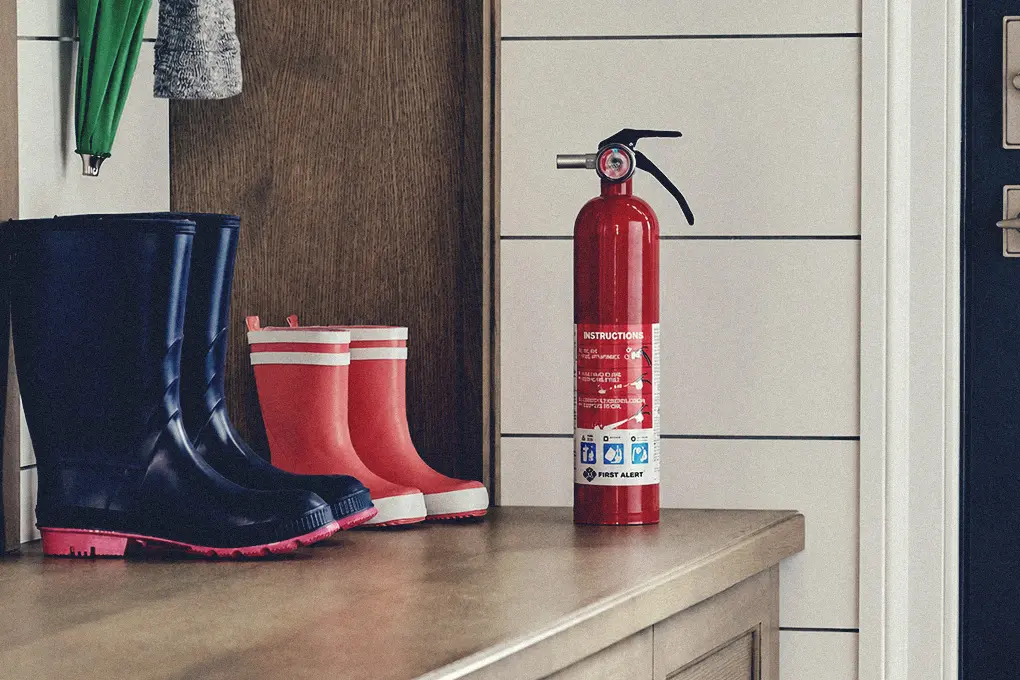
5. First Aid & Hygiene
During emergencies, minor injuries can turn serious quickly if not treated properly. Likewise, maintaining hygiene helps prevent illness and preserves morale. Your bug-out bag should contain a first aid kit that’s more than just adhesive bandages and antiseptic wipes.
Build a custom kit or expand a preassembled one with supplies that address wounds, infections, inflammation, and trauma. Include medications you or family members rely on, and rotate them regularly to maintain potency. Add trauma-specific items such as a tourniquet and pressure bandages in case of severe bleeding.
Hygiene is often overlooked but remains critical. Clean hands reduce disease transmission, while basic hygiene tools keep you healthy and functional. Wet wipes and hand sanitizer can serve when clean water is unavailable. Menstrual hygiene products and toilet paper should not be left out.
First aid gear to include
- Adhesive bandages, gauze, and antiseptics
- Pain relievers, tweezers, scissors, and medical tape
- Tourniquet and trauma dressing
- Soap, hand sanitizer, toothbrush, and toothpaste
- Toilet paper, menstrual supplies, wet wipes, and a small towel
Pro Tip
Take a hands-on first aid course to understand how to apply trauma supplies and properly treat wounds in high-pressure situations.
6. Tools & Multi-Purpose Items
Reliable tools are essential for shelter building, fire preparation, repairs, and other tasks you’ll encounter during a crisis.
Every item in your bag should serve more than one function when possible to conserve space and reduce unnecessary weight.
Start with a dependable multi-tool or a quality fixed-blade knife. These can handle cutting, food prep, gear repair, and more. Paracord has countless uses, from building shelters to creating splints or fishing lines. Duct tape can temporarily fix almost anything and should be stored efficiently by wrapping it around a pencil or water bottle.
A folding saw allows you to process larger branches for firewood or shelter without expending energy or dulling your knife.
Work gloves protect your hands from injury during labor-intensive tasks. Don’t overlook signal tools like a whistle, which can help rescuers locate you if you’re injured or lost.
Essential tools
- Multi-tool and fixed-blade knife
- Paracord (25 to 50 feet)
- Duct tape
- Folding saw
- Small repair kit (needles, wire, safety pins)
- Work gloves and signaling whistle
Pro Tip
Practice using your tools before an emergency. Knowing how to quickly tie knots, cut firewood, or perform gear repairs can save time and effort in a real-world scenario.
7. Navigation & Communication
During disasters, GPS signals and cell networks are often disrupted or completely unavailable. Knowing where you are, where to go, and how to stay in contact with others can mean the difference between staying safe and getting stranded.
Physical maps are essential. Print detailed local and regional maps and protect them in waterproof sleeves.
A compass remains one of the most reliable tools for direction but is only useful if you know how to read it. Learning basic land navigation skills is strongly recommended.
Communication tools should not depend on cellular networks alone. A hand-crank or battery-powered emergency radio can keep you updated with weather alerts and official announcements. Signal mirrors and whistles can help draw attention in a rescue situation. Keep a small notebook with written emergency contacts in case your phone becomes unusable.
Communication and navigation essentials
- Local and regional waterproof maps
- Compass
- NOAA-capable emergency radio (battery or hand-crank)
- Signal mirror, whistle, and backup charger or solar power bank
- Paper list of emergency contacts and routes
Pro Tip
Join a local preparedness group or amateur radio club to learn more about grid-down communication strategies. Don’t rely on your phone to be your only point of contact.
8. Documentation & Financial Resources
Having the right documents on hand can simplify access to emergency services, shelters, and financial assistance. Losing these during an evacuation can delay support, complicate travel, or prevent you from proving ownership of assets.
Carry copies of essential identification, medical records, and legal documents in a waterproof pouch. Include insurance information, home ownership documents, and any prescriptions or critical health notes.
For added security, save digital versions on an encrypted USB drive. If you’re comfortable with cloud services, use password-protected storage you can access from any device.
Emergency cash should be in small denominations to accommodate situations where change is limited or digital payment systems are down. A credit card with available balance can serve as backup. Be sure to keep this stored in a secure but accessible section of your bag.
Documents and financial resources to include
- ID copies, medical info, insurance papers, and property records
- Emergency contact sheet
- Encrypted USB drive with digital backups
- Cash in small bills and a credit card
- Local emergency shelter list and evacuation route maps
Pro Tip
Keep your documents updated annually. Store your bag somewhere easy to grab in case you need to evacuate in a hurry.
Building Your Bug-Out Bag: Step-by-Step Approach
Creating a dependable bug-out bag requires more than just tossing supplies into a backpack. The way you select, organize, and test your gear directly affects how effective it will be when it counts. Follow this structured approach to build a bag that works for your specific needs and situation.
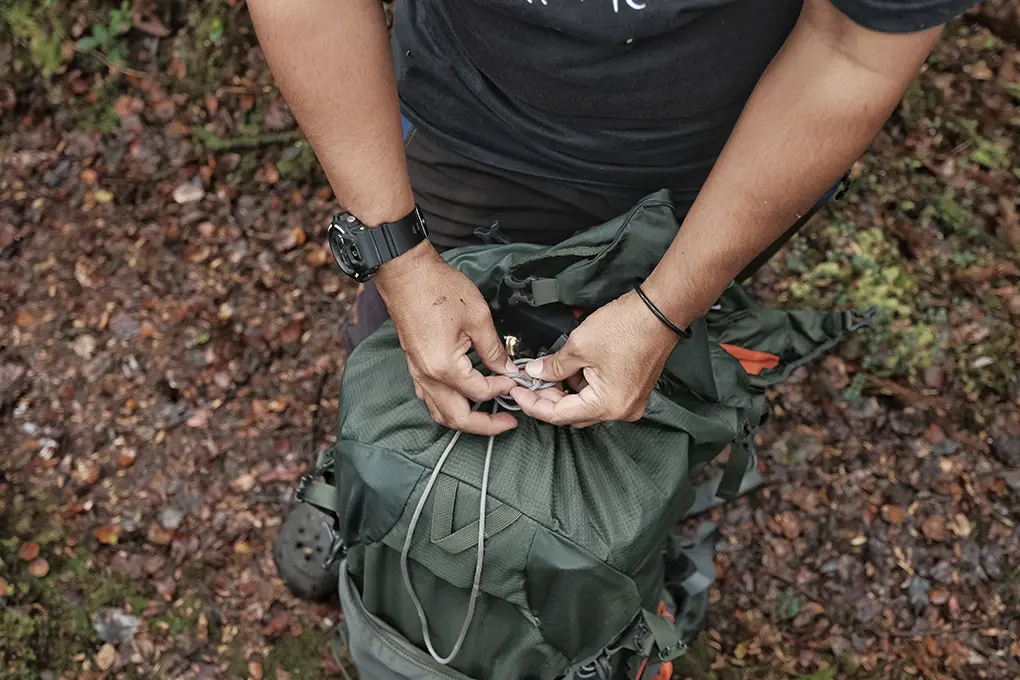
Step 1: Choose the Right Bag
Start by selecting a bag that is both functional and comfortable. A backpack is usually the best option, as it keeps your hands free and distributes weight evenly across your shoulders and hips.
Aim for a capacity between 40 and 65 liters for most adults. This is typically enough space for three days of supplies without being too heavy to carry long distances.
Choose a pack made from durable, water-resistant material with padded shoulder straps and a hip belt for support.
A well-ventilated back panel can reduce sweat buildup on longer treks. Look for multiple compartments to help organize your gear and external attachment points to secure items like tarps or sleeping mats. Stick with neutral or subdued colors to avoid drawing unwanted attention in uncertain environments.
Step 2: Organize Systematically
Packing your bag with purpose will help you access items quickly and reduce stress in emergency situations. Start by separating items by category: water, food, shelter, medical, clothing, tools, and documents.
Use colored or labeled stuff sacks to group similar items together so you can locate what you need without digging.
Place frequently used items, like flashlights, gloves, a multitool, or snacks, in the top lid or outer pockets where you can reach them quickly. Bulkier items like your sleep system, food rations, and clothing should go in the main compartment, packed in a way that balances weight across your back. If you carry anything that might get wet, store it in an external pocket or a waterproof stuff sack for easy isolation.
Step 3: Test and Adjust
Packing the bag is only the beginning. You won’t know if your setup works until you test it in real conditions. Load your bag completely and wear it for at least 30 minutes, ideally while walking or hiking. Pay attention to pressure points, balance, and how easily you can move.
Next, take your bag into the field. Practice setting up your shelter, filtering water, and preparing meals using only the contents of your bag.
Even better, spend a full night outside relying solely on your gear. This type of hands-on experience often reveals overlooked weaknesses or unnecessary items. Based on your test run, make thoughtful adjustments. Replace gear that didn’t work, remove redundant items, and make note of what you wish you had packed.
Special Considerations
While a standard bug-out bag meets general survival needs, there are situations where you’ll need to make specific adjustments. Factors like family responsibilities, travel method, location, and regional hazards all require tailored planning to ensure your kit is truly effective.
Family Bug-Out Bags
If you’re preparing for a family, it’s important to customize each bag according to age, ability, and medical needs. Children’s bags should be significantly lighter, focusing on essentials and comfort items such as a favorite toy, snack, or small blanket.
Adults can carry more weight and should shoulder the bulk of supplies like shelter materials, cooking equipment, and shared tools.
For infants or elderly family members, include critical items such as diapers, medications, mobility aids, and easy-to-prepare food. It also helps to build one central bag with communal gear like a compact stove, water filter, or multi-person tent.
Beyond the gear, establish a family emergency plan that outlines evacuation routes, local meeting points, and alternative communication methods in case you’re separated during a crisis.
Vehicle Emergency Kit
A well-stocked vehicle kit complements your main bug-out bag, especially if you need to evacuate by car. This kit should be stored in your trunk and include tools and supplies for both mechanical issues and survival needs.
Include jumper cables or a portable jump starter, such as the NOCO Boost Plus GB40, along with a basic tool kit and a functional spare tire with the equipment to change it.
You should also pack extra food, bottled water, and seasonal gear, like an ice scraper or a sunshade, depending on your location. A pair of durable shoes, weather-appropriate clothing, and emergency blankets are also smart additions in case you have to continue on foot.
Regional and Risk-Specific Adaptations
The gear you pack should reflect the hazards you’re most likely to encounter based on where you live or plan to travel.
People in hurricane-prone areas should prioritize waterproof storage, rain gear, and even lightweight flotation aids. In earthquake zones, dust masks, leather gloves, and a small pry bar can be invaluable for moving debris or protecting your lungs in dusty environments.
If you live near wildfire-prone regions, pack N95 respirator masks and safety goggles to protect against smoke and ash.
Cold-weather climates require extra insulation layers, wool socks, hand warmers, and a backup heat source. For those in dense urban areas, items like gas and water shut-off tools, a folding cart, and a compact dust mask can be critical for navigating compromised infrastructure.
DIY vs. Pre-Made Bug-Out Bags
When building a bug-out bag, one of the first decisions is whether to assemble it yourself or purchase a pre-made kit. There are pros and cons to each approach, and the best choice often depends on your experience, time constraints, and specific needs.
Pre-Made Bug-Out Bags
Pre-assembled kits offer convenience. They’re a one-stop solution with items selected by professionals who understand emergency preparedness.
These kits save time by eliminating the need to research, compare, and purchase every individual item. For beginners or those short on time, a high-quality pre-made bag from a reputable brand can be a great starting point.
DIY Bug-Out Bags
On the other hand, building your own kit gives you full control over the contents. You can tailor it to your location, climate, personal health conditions, and comfort preferences.
Selecting each item yourself also gives you direct familiarity with your gear, which is especially important under stress. You’ll also have more control over the quality of components, avoiding the generic or low-cost items often found in budget kits. In many cases, a DIY approach can be more cost-effective in the long run.
Recommendation: A practical middle ground is to start with a well-reviewed pre-made kit, such as those from Uncharted Supply Co, and then customize it. Add your own medications, clothing, documents, and region-specific gear to ensure the bag reflects your personal requirements.
Maintaining Your Bug-Out Bag
To keep your bug-out bag reliable, treat it as a dynamic system that requires regular checks, seasonal updates, and adjustments based on your changing needs.
- Review Your Bag Twice Per Year: Schedule a full inspection at the beginning of spring and fall. This helps ensure that everything remains functional and seasonally appropriate.
- Rotate Perishable Supplies: Replace expired food, water pouches, batteries, and medications. Clearly label expiration dates and keep a checklist to track what needs to be replaced and when.
- Check Battery-Powered Items: Test your flashlights, radios, and other electronics. Store batteries outside devices to prevent corrosion and always include fresh spares in your kit.
- Update Important Documents: Ensure that ID copies, insurance records, medical information, and emergency contact details are current. Refresh digital backups on an encrypted USB drive if needed.
- Adjust for Seasonal Needs: Swap out warm-weather or cold-weather clothing, sleeping bags, and shelter gear based on your region’s expected climate for the coming months.
- Reassess Based on Personal Changes: Modify your supplies if you’ve moved, had a change in family size, updated medications, or developed new health considerations.
- Test Gear Periodically: Practice using your gear in controlled conditions. Set up your shelter, operate your water filter, and cook a meal using your stove and food supplies.
- Inspect Pack Integrity: Look for signs of wear, including frayed straps, broken buckles, and torn fabric. Repair damage promptly or replace the bag if needed.
- Keep the Bag Accessible: Store your bag in a cool, dry place near an exit so it’s easy to grab without delay during an emergency.
Final Thoughts: Preparedness Mindset
For me, building a bug-out bag wasn’t just about ticking off a checklist—it was about taking responsibility for my own safety and my family’s well-being. Over time, I realized that gear alone isn’t enough. Mindset, knowledge, and the ability to stay calm in uncertain situations are just as important as anything you pack.
I’ve tested my own kit, made mistakes, and learned how to adapt. That’s why I always tell people: don’t just build a bag and store it away. Learn how to use everything in it. Practice setting up your shelter, filtering water, and cooking a meal with what you’ve packed. Make sure your family knows the plan and can carry their own weight—literally and figuratively.
Preparedness isn’t about fear. It’s about confidence. When you know you have the tools, the skills, and the mindset to handle what comes your way, it brings peace of mind that no pre-made kit can offer.
If you’re serious about being ready for whatever’s next, take the next step. Build your kit, test it, and keep learning. That’s how you turn a bug-out bag into real preparedness.
Ready to build your family’s ultimate bug-out bag without the guesswork? Explore Batten’s expert-vetted survival gear and emergency kits, all carefully selected by security professionals who understand what works when it matters most.
Frequently Asked Questions
How Often Should I Replace Medications in My Bug-Out Bag?
Check expiration dates every six months and replace any medications that have expired or are exposed to extreme temperatures.
What’s the Best Way to Practice Using My Bug-Out Bag?
Plan a weekend test run. Camp using only your gear, cook your stored food, and try setting up shelter to reveal gaps or gear issues.
Can I Carry a Bug-Out Bag on Public Transit?
Yes, but keep it discreet and compact. Use neutral-colored packs without tactical markings and ensure it meets local transit regulations.
Should I Pack Firearms or Defensive Tools in My Bug-Out Bag?
Only where legal and appropriate. Research your local laws, prioritize non-lethal options if unsure, and focus first on essentials like water, shelter, and navigation.
How Can I Keep My Bug-Out Bag From Getting Too Heavy?
Choose multi-use tools, limit redundancy, and test the pack fully loaded. Aim to keep the weight under 25% of your body weight.
Sources
- Many Americans aren’t prepared for a natural disaster | YouGov
- 2019_Domestic_Preparedness_Poll_Press_Release_-_Final.pdf
- Are Americans Prepared for Disasters? FEMA’s Survey Reveals Key Findings – Risk and Resilience Hub
- Wells Fargo Newsroom – Most Americans Ill-Prepared for Natural Disasters, Wells Fargo Survey Finds
- Is climate change making disasters worse?
- Build A Kit | Ready.gov
- Get Help: Disaster Relief and Recovery – Canadian Red Cross
- Microsoft Word – Emergency Water Storage.doc
- Survey Reveals Concern About Natural Disasters & Clean Water Access | Aquasana